Policy-Based Routing OpenWrt Package Documentation



-
Policy-Based Routing OpenWrt Package Documentation
- Notable version changes
- Description
- Features
- Customization
- Other Features
- Screenshots (luci-app-pbr)
- How It Works
- How To Install
- How to use
- Example Policies
- Example OpenWrt Configurations for More Complex Cases
- Footnotes/Known Issues
-
FAQ
- A Word About Default Routing
- A Word About Cloudflare’s 1.1.1.1 App
- A Word About DNS-over-HTTPS
- A Word About HTTP/3 (QUIC)
- A Word about a Modem interface alongside a WAN interface
- A Word about IPv6 and PPPoE
- A Word About Routing Netflix/Amazon Prime/Hulu Traffic
- A Word About Interface Hotplug Script
- A Word About Broken Domain Policies
- A Word About
protoand Ports - A Word About
nftSet Timeouts - A Word About Compatibility With Other Policy Routing Services
- A Word About uplink_ip_rules_priority
- A Word About the Maximum Number of Interfaces/Tunnels
- A Word About Negating Policy Options
- Getting Help
- First Troubleshooting Step
- Donate
- Error Messages Details
- Warning Messages Details
- Thanks
Notable version changes
Relevant pbr version
This README is relevant for the pbr version 1.2.3. If you’re looking for the README for the newer or older version of pbr, please check the README links within the luci-app-pbr.
Version 1.2.3
- Most of the code transitioned to ucode.
- Support for custom user scripts in ucode, using pbr API.
- This release will include support for mwan4 integration. More information on mwan4 integration below.
- The
statuscommand now shows a brief summary by default (routing mode and nft file paths). Use-dfor detailed diagnostic output. -
xfrmand other point-to-point interfaces are detected properly again, so gateway discovery no longer fails on them (ported from the shell 1.2.2 implementation). - A missing gateway on an otherwise-valid interface is reported as a warning rather than an error, and no longer forces a full service restart on an interface reload. See Warning: Unknown IPvX Gateway for device ‘XX’.
- The accepted range of uplink_ip_rules_priority is
99–32765(it was briefly raised to a floor of1001); values outside the range are clamped on load. See A Word About uplink_ip_rules_priority. - DNS policies without an explicit
dest_dns_portgenerate validnftsyntax again. - The
pbrchain cleanup no longer touchesfw4’s ownforward/output/dstnatbase chains, which could previously break LAN↔WAN forwarding and NAT port forwards. - Policies mixing negated and non-negated entries in
src_addr/dest_addr(for example!192.168.1.5 192.168.1.0/24) are classified correctly. - Negated entries in
src_addr/dest_addrnow act as exclusions on the rest of the policy instead of getting a rule of their own. A policy such as192.168.1.0/24 !192.168.1.5previously added a rule meaning “any source except192.168.1.5”, which matched almost everything and sent the whole network over that interface. Exclusions are now attached to the policy’s own entries, the way they always were forsrc_port/dest_port, so that policy now matches every source in192.168.1.0/24except192.168.1.5. A policy made up of negated entries alone is unchanged and still means “everything except these”. See A Word About Negating Policy Options. - Negated domain names in
dest_addr(for example!example.com) work again. The rule referred to annftset that was never created, which made the wholepbrruleset fail to load, so a single such policy could stop all policy routing. Upgrading is enough — the affected ruleset never installed, so there is nothing left behind to clean up, and any set left over from an earlier run is removed on the next start. - Editing the domain names in a policy now clears the addresses the old ones had resolved to. Previously those addresses stayed behind in the policy’s
nftset, so a domain you removed from a policy kept being routed by it — until the router was rebooted, unless nft_set_timeout was configured. Disabling the policy did clear them, which is why the two appeared to behave differently. Sets whose domain list has not changed keep their addresses across a reload, as before. - On a split uplink — uplink_interface and uplink_interface6 set to different interfaces — the second of the two is no longer pointed at another interface’s firewall mark. Where a tunnel happened to hold that mark, a policy naming the second uplink, or a
<interface>_dscpor icmp_interface option naming it, sent that traffic out the tunnel instead, silently and with nothing logged. Where nothing held it, as on a plainwanpluswan6router with no tunnels, the ruleset failed to load andpbrinstalled no rules at all. Which of the two uplinks was affected followed the order the interfaces appear in/etc/config/networkrather than the address family, so on some routers this landed onwanand an ordinarywanpolicy left by a tunnel. Upgrading is enough. - Stopping or restarting
pbrno longer clearsdnsmasq’s wholeaddnmountlist.pbrremoved its own entry with a call that took every entry with it, so other packages’ directories —adblock’s among them — stopped being mounted intodnsmasq’s jail the next time it started, and name resolution broke until that package was reloaded. With more than onednsmasqinstance configured it was worse: every instance was cleaned, including the ones resolver_instance does not name, and those never had anything re-added. - A policy name containing a double quote, a line break, or more than 128 bytes no longer takes the whole ruleset down. The name is written into every
nftcomment the policy produces, and a single unusable one madenftreject the entire file, sopbrfailed to start withERROR: Failed to install fw4 nft fileand nothing routed at all. Double quotes are now folded to single quotes, line breaks become spaces, and the name is truncated to 128 bytes — which isnft’s own limit, counted in bytes rather than characters. -
nft_set_timeout and nft_set_gc_interval produce valid
nftsyntax. Previously any non-empty value was written in a formnftrefused, so the ruleset failed to install and the options could not be used at all; a value that is not a validnfttime value is now ignored instead of reaching the ruleset. See A Word AboutnftSet Timeouts. - A Tor policy no longer breaks the ruleset when the Tor service is not running. The redirect ports are read from
torrcrather than from the running daemon, so they are right while Tor is still starting — which matters at boot, wherepbrstarts before Tor does. A Tor policy on a router with notorrcat all is now reported as having an unknown interface, instead of emitting a rulenftrejects. - Arguments in the commands
pbrruns are quoted individually, so interface and policy names containing spaces or shell punctuation are passed through as written rather than being split or interpreted. - The
Unknown IPv6 gatewaywarning is no longer logged twice for the same interface. - Setting icmp_interface — Default ICMP Interface in the WebUI — no longer stops the service from starting when IPv6 is enabled. The IPv6 rule was written as
ip6 protocol icmp, whichnftrefuses because IPv6 headers have noprotocolfield and the IPv6 ICMP protocol isicmpv6; since the whole ruleset is validated in one pass, one malformed rule took every policy down with it. It is now emitted asip6 nexthdr icmpv6. - A policy’s proto is reported when it cannot do what it looks like it does. Set without a port it never reached the rule at all, so the policy silently routed every protocol; and a protocol that has no ports, given one, produced a rule
nftrefuses and the service failed to start. The first is now a warning naming the policy, the second rejects that policy so the rest of the ruleset survives. See A Word Aboutprotoand Ports. - The chain option documented
inputandpostrouting, whichpbrhas never created a chain for — a policy naming one produced a rulenftcould not place (Error: No such file or directory; did you mean chain 'pbr_output' in table inet 'fw4'?) and the whole ruleset was rejected, leaving the service inactive. The supported values areprerouting,forwardandoutput.
Version 1.2.2
- Much improved/overhauled support for both dual-stack uplink interfaces (IPv4 and IPv6 addresses on the same interface) and split (separate
wanandwan6) interfaces. - Preliminary support for netifd integration. More information on netifd integration below.
Version 1.2.0
- Internal performance/reliability improvements, specifically boot-up start reliability on all platforms.
- Drop the fw4 hotplug/trigger script due to the use of fw4 include nft file.
- The
procd_lan_devicelist renamed tolan_device. - The
procd_wan_interface/procd_wan6_interfaceoptions renamed touplink_interface/uplink_interface6respectively. - The
wan_ip_rules_priority/wan_markoptions renamed touplink_ip_rules_priority/uplink_markrespectively. - Drop transition/upgrade path from
vpn-policy-routingandvpnbypass. - Include the DNS Prefetch user script created by @betonmischer86.
Version 1.1.8
- This release completely drops the iptables/ipset (and resolvers using ipset) support.
- This release uses the fw4 include nft file by default.
- The Wireguard Server & Client user script integrated into the
pbrservice, if Wireguard servers are discovered, their routing is automatically configured to go over WAN. - To enable targeting a Wireguard server tunnel, explicitly add its interface name to supported_interface option.
- If the directory
/etc/pbr.d/exists, all the files in that directory are processed as custom user files without the need to add them topbrconfig. - The
procd_lan_deviceconfig list allows you to override the default device (br-lan) used for LAN interface detection.
Description
This package provides flexible, rule-based routing for OpenWrt — allowing you to selectively route traffic over WAN, VPN, or tunnels based on source IP, destination IP, port, protocol, or domain. It is a lightweight alternative to mwan3 for advanced routing control.
Key Features
- Route by IP, MAC address, port, protocol, or domain.
- Supports multiple interfaces: WAN, OpenVPN, WireGuard, tunnels.
- Optional LuCI Web UI for rule management and status display.
- Works with
dnsmasq-fullfor nft set domain lookup. - Includes fallback and health check logic for resolver stability.
Features
Gateways/Tunnels
- Policies can target either WAN or a VPN tunnel interfaces (uplink interface can be overridden).
- L2TP tunnels supported (with protocol names l2tp*).
- OpenConnect tunnels supported (with protocol names openconnect*).
- OpenVPN tunnels supported (with device names tun*).#1 #2
- PPTP tunnels supported (with protocol names pptp*).
- NetBird tunnels supported (with device name wt*).
- Tailscale tunnels supported (with device name tailscale*).
- Tor tunnels supported in nft mode only (interface name must match tor). See Tor for setup and caveats.
- Wireguard tunnels supported (with protocol names wireguard*).
- IPsec (xfrm) tunnels supported, for routing purpose treated as a point-to-point link. needs testing.
In general all interfaces with a point-to-point (POINTOPOINT) link are supported but for those not explicitly mentioned you need to add the interface on Advanced configuration tab in Supported Interfaces.
Fw4 Include Nft File Mode
In this mode instead of translating each policy into one (or a few) nft commands and running them individually, in this mode, pbr creates a single fw4 include nft file (temporary file located at /var/run/pbr.nft and if it contains no errors, the permanent file is installed at /usr/share/nftables.d/ruleset-post/30-pbr.nft). This file contains all the nft commands that pbr service needs to set up all the policies, dns policies and process custom user files. On any OpenWrt firewall (fw4) reload, this file is automatically included without the need to run the pbr init script again.
Routing Tables Modes
The pbr package supports three routing table modes, which determine how routing tables and marking chains are managed:
-
Dynamic Routing Tables: the
pbrpackage manages its own routing tables and marking chains, all within the single fw4 include nft file it creates. This is the default/fallback mode. -
Netifd Extensions/Integration: the
pbrpackage delegates routing table and marking chain management to OpenWrt’snetifddaemon via a separate fw4 include nft file that never needs updating. -
Mwan4 Integration: the
pbrpackage uses routing tables and marking chains created by themwan4package, and can targetmwan4strategy elements in addition to interfaces.
Dynamic Routing Tables
In this mode, pbr is triggered on each supported interface action (up/down/update) to create/update the relevant routing table depending on the interface status. Due to the use of the fw4 include nft file, no iteration over policies is needed on interface actions, however Netifd Extensions/Integration offers better performance with a more elegant OpenWrt-native solution and Mwan4 Integration adds multi-WAN failover/load balancing with strategy-based policy targets.
Netifd Integration
From version 1.2.2, the pbr package can integrate better with netifd-capable interfaces, requiring no reload/restart when such interfaces are updated.
To enable netifd integration (or netifd extensions), do the following:
-
Set proper values for required netifd options:
uci set pbr.config.netifd_strict_enforcement=1 uci set pbr.config.netifd_interface_default=wan uci add_list pbr.config.netifd_interface_local=lan # supports multiple local interfaces like lan, guest, iot, kids, etc. uci set pbr.config.netifd_enabled=1 uci commit pbr -
Run the following commands:
uci set pbr.config.enabled=0
uci commit pbr
service pbr stop
service pbr netifd install
uci set pbr.config.enabled=1
uci commit pbr
service pbr start
NEED TESTING/LIKELY TO BE BROKEN:
- no idea how setting route_allowed_ips=1 in wg client configs affects routing
- setting netifd_interface_default to anything other than wan
- mix of netifd (wireguard) and not netifd (openvpn) tunnels: the
process_interfacewithpre-initis not aware of netifd records in rt_table, might break something - setting pbr.config.netifd_strict_enforcement to both 0 and 1 needs real-world testing
- for non-netifd tunnels (like OpenVPN) I switched from copying all the routes from main table to pbr_${interface} tables to: ip -4 rule replace fwmark “${mark}/${fw_mask}” lookup ‘main’ suppress_prefixlength 0 priority “$((priority - 1000))” I hope it still works for VLANs and such
- non-netifd tunnels might or might not work at all with netifd_strict_enforcement set to 1 (when there are no default routes in main table)
- embedding the netifd flavour with all options correctly set into an image; not sure if using Makefile to install extension is better/worse than using uci-defaults file for that
AVAILABLE COMMANDS:
- service pbr netifd install: installs netifd support
- service pbr netifd uninstall: uninstalls netifd support but keeps netifd_enabled flag in config (used in pre-rm)
- service pbr netifd remove: uninstalls netifd support and removes the netifd_enabled flag in config (used when disabling netifd support so that - post-install will not reactivate it)
- service pbr netifd check: helper to check the status of the netifd_enabled flag (used in post-install)
OPTIONS:
- netifd_interface_local: list of interfaces to be treated as LANs
- netifd_interface_default: this interface will be set as default gateway interface by pbr-netifd
- netifd_interface_default6: same as above, but for IPv6
- netifd_strict_enforcement: when set to 0, sets the netifd_interface_default’s netifd tables to ‘main’, so that the ‘main’ table now has a default route from that interface
- netifd_strict_enforcement: when set to 1, uses the list from netifd_interface_local to set up routes for those interfaces to look up in the netifd_interface_default’s table.
TODO:
- adjust/make configurable arbitrary priority shifts for default rules in both netifd/non-netifd configs (currently +/- 1000)
- detect the reasons to reinstall netifd support and actively reinstall it (on start maybe?)
- identify default gateway/interface in CLI/WebUI
- support wg server interfaces same way they are currently supported thru explicit supported/ignored interface lists
- support wan6
- strict_enforcement option set to 2 and then neither main table to LANs rules are added?
- automatically add catch-all marking policy in the end if pbr.config.netifd_strict_enforcement is set to 1/2?
- WebUI: display netifd interfaces differently than non-netifd
- WebUI: add UE to install netifd support
- WebUI: add UE to detect the reasons to reinstall netifd support
Mwan4 Integration
When the mwan4 package is installed and running, pbr automatically detects it and operates in mwan4 integration mode. In this mode:
- Routing tables and marking chains are fully managed by
mwan4–pbrreads the existing marks frommwan4’s fw4 include nft file rather than creating its own. - In addition to targeting individual interfaces,
pbrpolicies can targetmwan4strategy elements (e.g., load balancing or failover groups), combiningpbr’s flexible policy matching withmwan4’s multi-WAN capabilities. - On service stop,
pbrleavesmwan4’s marking chains intact since they are owned bymwan4.
No additional configuration is needed – if mwan4 is running, pbr will use it automatically.
IPv4/IPv6/Port-Based Policies
- Policies based on local names, IPs or subnets. You can specify a single IP (as in
192.168.1.70) or a local subnet (as in192.168.1.81/29) or a local device name (as innexusplayer). IPv6 addresses are also supported. - Policies based on local ports numbers. Can be set as an individual port number (
32400), a range (5060-5061), a space-separated list (80 8080) or a combination of the above (80 8080 5060-5061). Limited to 15 space-separated entries per policy. - Policies based on remote IPs/subnets or domain names. Same format/syntax as local IPs/subnets.
- Policies based on remote ports numbers. Same format/syntax and restrictions as local ports.
- You can mix the IP addresses/subnets and device (or domain) names in one field separating them by a space (like this:
66.220.2.74 he.net tunnelbroker.net). - See Policy Options section for more information.
Domain-Based Policies
- Policies based on (remote) domain names can be processed in different ways. Please review the Policy Options section and Footnotes/Known Issues section, specifically #5 and any other information in that section relevant to domain-based routing/DNS.
Use Resolver’s Set Support
- If supported on the system, service can be set to utilize resolver’s set support. Currently supported resolver’s set options are listed below.
Use DNSMASQ nft sets Support
- The
pbrpackage can be configured to utilizednsmasq’snftsetssupport, which requires thednsmasq-fullpackage withnftsetssupport to be installed (see How to install dnsmasq-full). This significantly improves the start up time becausednsmasqresolves the domain names and adds them to the appropriatenftsetin background.dnsmasq’snftsetalso automatically adds third-level domains to theset: ifdomain.comis added to the policy, this policy will affect all*.domain.comsubdomains. This also works for top-level domains (TLDs) as well, a policy targeting theatTLD for example, will affect all the*.atdomains. - The suffix match also means the set collects addresses for subdomains you did not list, and the router’s own traffic counts: an
apk updatefilesdownloads.openwrt.orgunder a policy foropenwrt.org. Where such a subdomain is served from a shared CDN front end, the address it adds is shared with unrelated sites — and thenftrule matches on the address alone, so the policy carries on routing everything else behind that address, with nothing to indicate which name put it there. Prefer the most specific name that does the job, and see A Word AboutnftSet Timeouts for ageing such entries out. - Please review the Footnotes/Known Issues section, specifically #5 and #7 and any other information in that section relevant to domain-based routing/DNS.
Physical Device Policies
- Policies based on a local physical device (like a specially created wlan). Please review the Policy Options section and Footnotes/Known Issues section, specifically #6 and any other information in that section relevant to handling physical device.
DSCP Tag-Based Policies
You can also set policies for traffic with a specific DSCP tag. On Windows 10, for example, you can mark traffic from specific apps with DSCP tags (instructions for tagging specific app traffic in Windows 10 can be found at serverfault).
DNS Policies
Use of DNS Policies allows to route the name resolution (DNS) requests from local devices/IP addresses or MAC addresses thru a specific DNS server. Either the first DNS server from a specified interface or a specific DNS server indicated by its IP address can be used. Please note that the use of DNS Policies will override local DNS Hijacking (if enabled) and also will prevent the domain-based policies from working for the local devices specified in the DNS Policy, as your dnsmasq will not be queried by those local devices anymore.
Tor
Tor is the one supported “interface” which isn’t a network interface at all. Every other target (WAN, a VPN tunnel, an mwan4 strategy) gets a routing table, a firewall mark and an ip rule. Tor has none of those: it runs on the router itself and listens on two local ports, so the service redirects selected traffic into those ports with destination NAT instead of routing it.
Two consequences follow, and both surprise people:
-
Only ports 53, 80 and 443 are redirected. DNS on
udp/53goes to Tor’sDNSPort, and TCP on80and443goes to Tor’sTransPort. UDP on 80 and 443 is redirected as well, but Tor’sTransPortaccepts TCP only, so nothing is listening for it — in practice that blocks QUIC/HTTP3 on 443 rather than carrying it, which at least stops it slipping past Tor. Anything else — an onion service on another port, SSH, mail — is not redirected at all and leaves through the normal uplink. A Tor policy is not a kill switch. -
dest_port,protoandchainare ignored on a Tor policy, because those rules already fix all three.src_portis worse than ignored and produces an invalid rule. The service warns about all four; match on source address instead.
Setup
Install the tor package and make sure /etc/tor/torrc contains at least:
AutomapHostsOnResolve 1
VirtualAddrNetworkIPv4 172.16.0.0/12
TransPort 0.0.0.0:9040
DNSPort 0.0.0.0:9053
AutomapHostsOnResolve is not optional — it is what makes Tor’s DNSPort invent a virtual address for a .onion name. If IPv6 is enabled, add TransPort [::]:9040 and DNSPort [::]:9053 as well, or IPv6-preferring clients will reach a port nothing is listening on.
The service reads the ports from /etc/tor/torrc only, in the address:port form shown above. Ports defined anywhere else — including /etc/tor/custom, which is where OpenWrt’s own Tor client guide puts them — are not seen, and the service falls back to 9053/9040.
Then set the policy’s interface to tor and match on the source address:
config policy
	option name 'Tor for one device'
	option interface 'tor'
	option src_addr '192.168.1.50'
Leave dest_addr empty unless you specifically want to restrict which destinations go through Tor. With a source-only policy, that client’s DNS is redirected to Tor’s DNSPort, which resolves .onion natively — nothing further to arrange. Note this sends all of that client’s DNS through Tor, so any local filtering (adblock and similar) no longer applies to it.
.onion addresses
A source-matched policy as above handles .onion on its own. If instead you put a domain in dest_addr, name resolution has to go through dnsmasq, and on a stock OpenWrt .onion will not resolve at all: OpenWrt ships /usr/share/dnsmasq/rfc6761.conf containing an addressless server=/onion/, which makes dnsmasq answer .onion locally with NXDOMAIN and overrides any server=/onion/127.0.0.1#9053 you add. Check with:
logread | grep "locally-known"
If onion is listed there, that is what is happening.
Going deeper
The above covers a working setup. For the full mechanism — how the rules are built, how destination-based Tor policies fill their nft set, the complete list of ways a .onion setup can fail silently, and step-by-step diagnostics — see How Tor routing works in pbr.
Blackhole Interface
The service has no blackhole target of its own, but you can build one out of two things it already does: it reads its interfaces from /etc/config/network rather than from running devices, and Strict Enforcement gives an interface that has no device an unreachable default route in its own routing table#9. Point a policy at such an interface and the matched traffic has nowhere to go.
This is the cleanest way to cut a device, or a list of domains, off the internet while leaving everything else about it working. It needs no extra package and no firewall rules.
Setup
Create an unmanaged interface with no device, and leave it out of the boot sequence — there is nothing for netifd to bring up:
config interface 'blackhole'
	option proto 'none'
	option auto '0'
In LuCI this is Network → Interfaces → Add new interface, protocol Unmanaged, device left empty, and Bring up on boot unticked on the Advanced Settings tab. Do not use the Disable button on the interface afterwards — see the notes below.
Then add the interface to the service’s supported interfaces, on the Advanced tab of the WebUI or in the config directly:
config pbr 'config'
	...
	list supported_interface 'blackhole'
A device-less interface is not detected as an uplink, a WAN or a tunnel, so this list is the only thing that makes it selectable as a policy target.
Strict enforcement is enabled by default and nothing needs to be done for it. It is, however, what makes this work at all: with it turned off the service installs no route and no ip rule for an interface that has no device, while the policies go on marking traffic — which then leaves through your normal uplink. The service logs Failed to set up 'blackhole/...' in that case, but the policies themselves report success.
Finally, write policies pointing at it:
config policy
	option name 'No internet for the games console'
	option interface 'blackhole'
	option src_addr 'AA:BB:CC:DD:EE:FF'

config policy
	option name 'Blackhole these domains'
	option interface 'blackhole'
	option dest_addr 'example.com tracker.example.net'
Match local devices by MAC address, not by IP
This matters as soon as IPv6 is enabled. A policy whose src_addr is an IPv4 address produces an IPv4 rule and nothing else, so that device’s IPv6 traffic is never matched and leaves through the normal uplink — the blackhole appears to work while half of it leaks. A MAC address produces a single rule that matches at the ethernet layer, which covers both address families at once.
This applies to source policies only. A dest_addr policy needs no such care: the service builds an IPv4 and an IPv6 destination set for it either way, so domain and remote-address blackholing is already dual-stack.
Domain blackholes fill on demand
With the recommended dnsmasq.nftset option#7, a domain policy’s set starts empty and is filled as clients resolve those names through the router. Everything in A Word About Broken Domain Policies applies here unchanged — but read it with the stakes reversed. A routing policy whose set has not filled yet sends traffic down the normal path, which is a delay. A blackhole policy whose set has not filled yet lets through exactly the traffic you meant to stop.
So the usual causes matter more than usual: an answer still cached on the client, encrypted DNS, a resolver set by hand or handed out through DHCP option 6, hardcoded DNS servers, or a DNS Policy sending that device’s lookups elsewhere. Any one of them means the client never asks the router, the address never reaches the set, and the blackhole never sees the traffic. Flushing the client’s DNS cache#5 covers the first; DNS hijacking covers most of the rest.
To close the gap at startup rather than waiting for the first lookup, enable the pbr.user.dnsprefetch custom user file, which resolves your policy domains in advance — see Resolving Domain Names in Advance. Note that it fills the sets once per service run and does not re-resolve on a timer, so a service that rotates its addresses will be blackholed on the addresses already in the set until the next reload or until a client resolves it again. Setting nft_set_timeout ages stale entries out.
A blackhole policy is a routing control, not a name filter. If a domain must be blocked no matter how the client resolves it, block it at the DNS layer instead.
What a blackholed device can still do
A blackhole policy removes the route off your network and nothing else. The device keeps talking to the router — DHCP, DNS, the WebUI — and keeps reaching other hosts on the LAN, because both of those are resolved by routing rules that sit above the service’s own. That is usually what is wanted, but it is not a total cut-off, and a device that only needs the local network will not notice anything has happened.
Note also that policies use the prerouting chain by default, which sees only forwarded traffic. To blackhole traffic originating on the router itself, set the policy’s chain to output.
The gateway warning is expected
A working blackhole interface produces two warnings on every start:
WARNING: Unknown IPv4 gateway for 'interface:blackhole; device: '.
WARNING: Unknown IPv6 gateway for 'interface:blackhole; device: '.
They are correct and can be ignored: the interface genuinely has no gateway, which is the entire point. This is the same warning a tunnel that is down produces, and it is described in Warning: Unknown IPvX Gateway for device ‘XX’. Routing is unaffected.
Do not disable the interface
Unticking Bring up on boot is correct and is what the setup above does. Pressing the Disable button on the interface is not: that sets option disabled '1', which removes the interface from the supported list entirely. Every policy targeting it then fails with Policy '<name>' has an unknown interface! and stops filtering. The errors are logged, but the traffic those policies were holding back starts flowing again.
Custom User Files
If the custom user file includes are set, the service will load and execute them after setting up routing and the sets and processing policies. This allows, for example, to add large numbers of domains/IP addresses to nft sets without manually adding all of them to the config file. Custom user files can be written as shell scripts (.sh or no extension) or as ucode scripts (.uc).
The following custom user files are provided:
-
/usr/share/pbr/pbr.user.dnsprefetch: a shell script provided to resolve destination domain names in advance when using thednsmasq.nftsetoption. See Resolving Domain Names in Advance. -
/usr/share/pbr/pbr.user.aws.uc: a ucode script provided to pull the Continental US AWS IPv4/IPv6 addresses into the WAN user destination sets that the service sets up. -
/usr/share/pbr/pbr.user.netflix.uc: a ucode script provided to pull the Continental US Netflix (AS2906) IPv4/IPv6 addresses into the WAN user destination sets that the service sets up.
Resolving Domain Names in Advance
When using the dnsmasq.nftset option, a domain-based policy does nothing until someone on your network looks the domain up through the router. The pbr.user.dnsprefetch custom user file closes that gap by resolving every domain in your policies itself, so the sets are populated before any client asks.
Enable it like any other custom user file, by setting option enabled '1' on its config include section, and watch it work with:
logread | grep pbr
A few things are worth knowing before you enable it:
-
It requires the service version 1.2.3 or later. The file shipped with 1.2.2 and earlier is a different script, written for the older shell implementation of the service. Each version installs its own copy, so the one that came with your package is the correct one. If you place the script somewhere other than
/usr/share/pbr/pbr.user.dnsprefetch, edit the path near the top of it — a sourced shell script cannot work out where it lives. -
It runs once per service run: on
start,restartandreload. It does not run when the service is stopped, nor on a start that was deferred because the uplink was not up yet. An interface going down and back up does not prefetch by itself either — the service handles an interface update by reloading only that interface, which leaves the custom user files, and the sets they fill, untouched. The addresses already in the sets stay there across such an update, and the next fullreloadrefreshes them. -
There is no timer. Nothing re-resolves a domain once its entry expires from the
dnsmasqcache, so a set keeps the addresses it already has until the next service run. This is what a prefetch is — it fills the sets once, in advance, rather than keeping them current. A domain whose addresses rotate faster than you reload the service will go on being routed by the addresses already in the set, and the new ones are added when a client next resolves that domain through the router, exactly as they would be without the prefetch. -
The sets are not filled instantly. The prefetch runs in the background, after the service has finished its own work, and waits for
dnsmasqto answer a query before it resolves anything — signalling adnsmasqthat is still starting would kill it. On a reload the sets are usually filled within half a minute. After a reboot it takes longer, around a minute on the router this was tested on, becausednsmasqneeds that long to start answering after the service restarts it. Until the prefetch finishes, domain policies behave exactly as they would without it, so nothing is broken if a set is still empty right after a reload. Progress and the final count are logged. -
It briefly flushes the
dnsmasqcache while it works.dnsmasqonly adds addresses to annftset when it fetches an answer from upstream, so a domain answered from its cache would never fill the set.
Note that enabling this file negates one of the advantages#7 of using dnsmasq.nftset, as the domains are resolved when the service runs rather than on demand.
If you want to create your own custom user files, please refer to Processing Custom User Files.
Strict Enforcement
- Supports strict policy enforcement, even if the policy interface is down – resulting in network being unreachable for specific policy (enabled by default).
- Stops forwarded traffic during (re)starts and reloads to minimise potential WAN leaks. Note: This only stops forwarded traffic between LAN and WAN; the router itself can still connect to the internet. If the router is disrupted (e.g., power loss or crash) while PBR is executing, forwarding may remain disabled. In this case, forwarding can be re-enabled manually with
service pbr enable_forward.
Customization
- Can be fully configured with
ucicommands or by editing/etc/config/pbrfile. - Has a companion package (
luci-app-pbr) so policies can be configured with Web UI.
Other Features
- Doesn’t stay in memory, creates the routing tables and
nftrules/setsentries which are automatically updated when supported/monitored interface changes. - Proudly made in
 Canada , using locally-sourced electrons.
Screenshots (luci-app-pbr)
Service Status
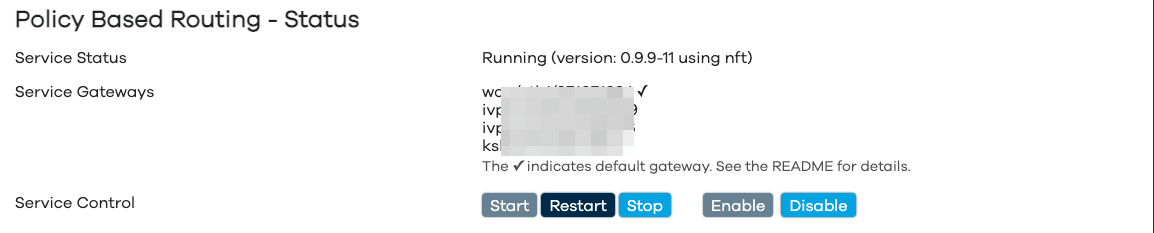
Configuration - Basic Configuration
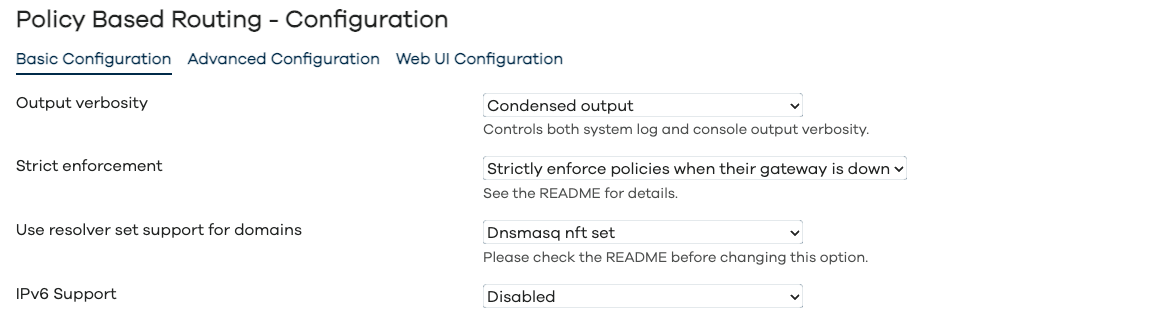
Configuration - Advanced Configuration
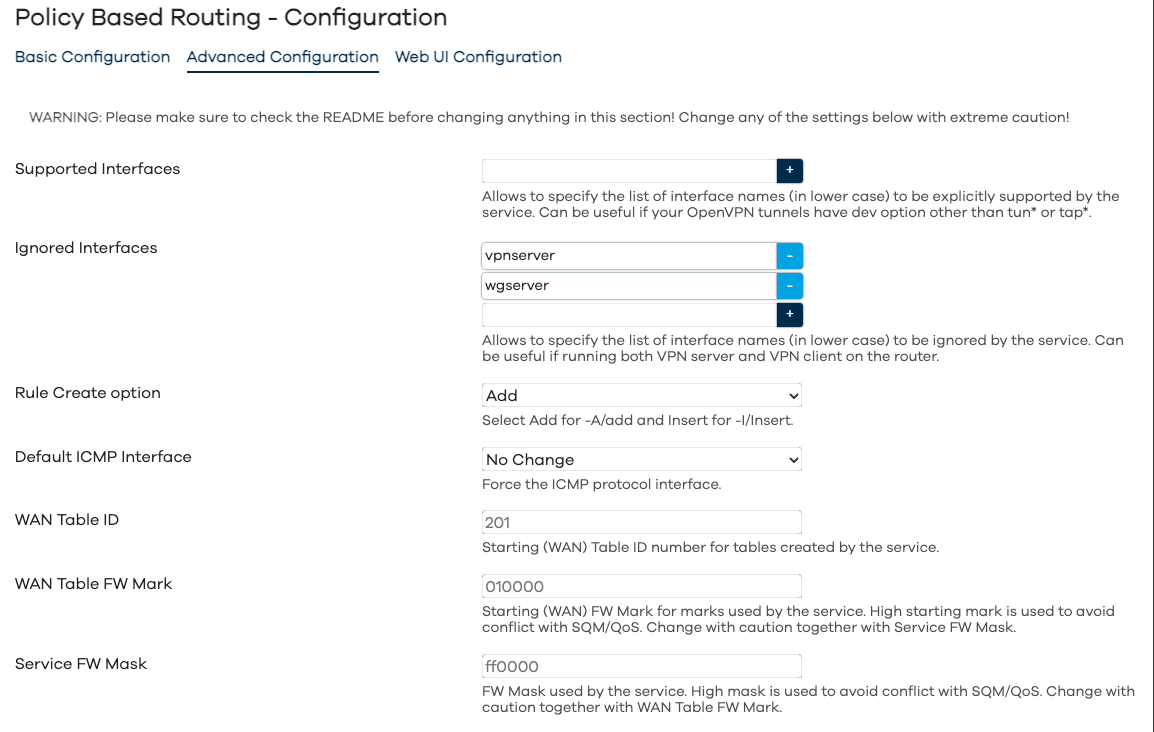
Configuration - WebUI Configuration
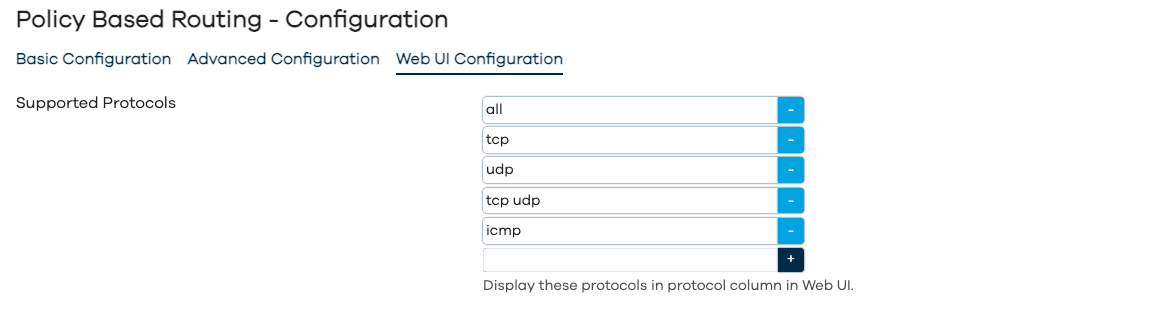
Policies
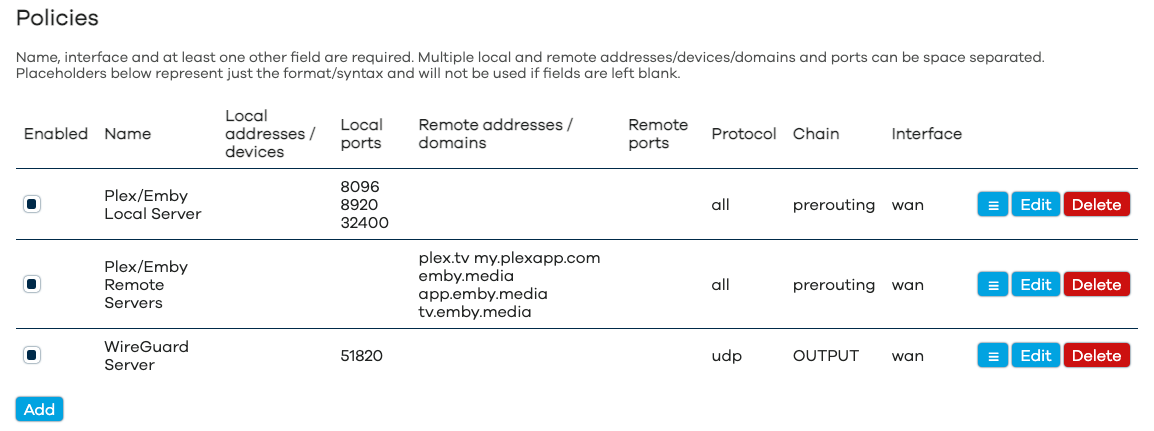
DSCP Tagging
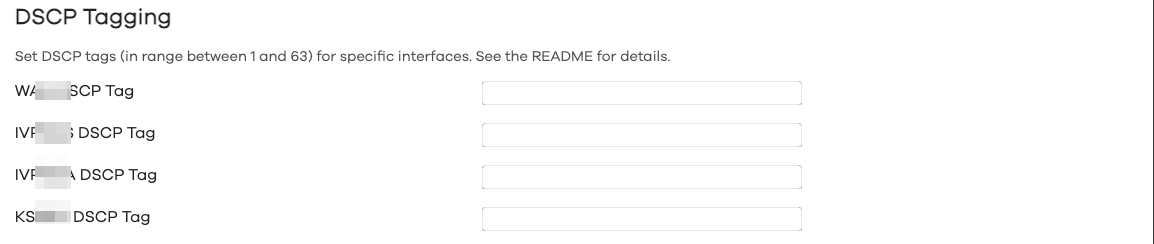
Custom User File Includes
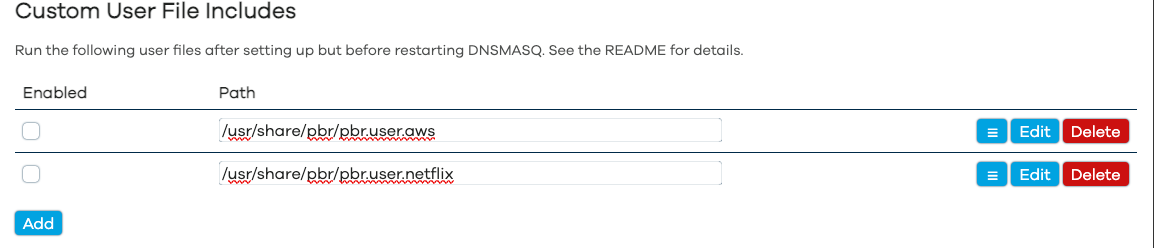
How It Works
How It Works (nft mode)
On start, this service creates routing tables for each supported interface (WAN/WAN6 and VPN tunnels) which are used to route specially marked packets. Rules for the policies are created in the service-specific chains set up by the fw4-specific nft scripts installed with the package. Evaluation of packets happens in these pbr_* chains after which the packets are sent for marking to the pbr_mark_* chains. Whenever possible, the service also creates named sets for dest_addr and src_addr entries and anonymous sets for dest_port and src_port. The service then processes the user-created policies.
Processing Policies
Each policy can result in a new nft rule and possibly an anonymous/in-line or a named nft set to match dest_addr and src_addr. Anonymous/in-line sets may be created within nft rules for dest_port and src_port.
Processing Policies (nft mode)
- Policies with the MAC-addresses, IP addresses, netmasks, local device names or domains will result in a rule targeting named
nftsets. - Policies with non-empty
dest_portandsrc_portwill be created with anonymousnftsetswithin the rule. - The
dnsmasqnftsetentries will be used for domains (if supported and enabled).
Processing DNS Policies
Each DNS policy can result in either a new nft rule and possibly an anonymous/in-line or a named nft set to match src_addr.
If the IP addresses (either legacy IPv4 or IPv6 family or both) are defined in the dest_dns setting for the dns policy, then those addresses will be used to explicitly set the resolver address for a specific DNS policy.
If the network interface is defined in the dest_dns setting for the dns policy, then the first matching-family (either IPv4 or IPv6) DNS server will be used for a specific DNS policy.
Processing DNS Policies (nft mode)
- Policies with the MAC-addresses, IP addresses, netmasks or local device names will result in a rule targeting an anonymous/in-line or a named
nftsets.
Policies Priorities
- The policy priority is the same as its order as listed in Web UI and
/etc/config/pbr. The higher the policy is in the Web UI and configuration file, the higher its priority is. - If set, the
DSCPpolicies is set up first when creating the interface routing. - If enabled, it is highly recommended that the policies with
IGNOREtarget are at the top of the policies list.
Processing Custom User Files
If at least one custom user file is enabled, the service will create the following nft sets for each interface and set up the proper routing for them.
IPv4 sets (always created):
-
pbr_interface_4_dst_ip_user: for destination/remote IPv4 addresses and IPv4 CIDR netblocks -
pbr_interface_4_src_ip_user: for source/local IPv4 addresses and IPv4 CIDR netblocks -
pbr_interface_4_src_mac_user: for source/local MAC addresses
IPv6 sets (only created when ipv6_enabled is set to 1):
-
pbr_interface_6_dst_ip_user: for destination/remote IPv6 addresses and IPv6 CIDR netblocks -
pbr_interface_6_src_ip_user: for source/local IPv6 addresses and IPv6 CIDR netblocks -
pbr_interface_6_src_mac_user: for source/local MAC addresses
Shell Scripts
Shell script user files (.sh extension or no extension) are sourced inside a wrapper that provides a nft() shell function. Instead of executing nft commands directly, the wrapper captures all nft calls and adds them to the service’s nft file. Shell scripts must not use "$nft" list or "$nft" -f commands — files containing these patterns will be rejected as incompatible.
Ucode Scripts
Ucode user files (.uc extension) are written in ucode and must return either a function or an object with a run() method. The returned function receives an api object providing access to the service’s nft infrastructure.
A ucode user script should always check the api.compat property before proceeding, to ensure it is running on a compatible version of pbr:
return function(api) {
	if (!api.compat || api.compat < 29) return;

	// your logic here
};
The api object provides the following properties and methods:
| Property/Method | Description |
|---|---|
api.compat |
An integer indicating the API compatibility level of the running pbr service. Scripts should check this value and return early if it is lower than expected. |
api.table |
A string containing the nft table reference (e.g., inet fw4) for use in nft commands. |
api.nft(rule_line) |
Adds an nft command to the service’s nft file. The command must start with add, insert, or create — other operations are rejected as unsafe. |
api.nft4(rule_line) |
Same as api.nft() but intended for IPv4-specific rules. The command is always added. |
api.nft6(rule_line) |
Same as api.nft() but intended for IPv6-specific rules. The command is only added when ipv6_enabled is set to 1; otherwise the call is silently ignored. |
api.download(url) |
Downloads the content at the given URL using the system’s available downloader (curl, wget, or uclient-fetch). Returns the content as a string on success, or null on failure. |
api.marking_chain(iface) |
Returns the nft marking chain name for the given interface (e.g., for use in goto rules). Works with standard, netifd, and mwan4 interfaces. Returns null if the interface is not found. |
api.strategy_chain(strategy) |
Returns the nft chain name for the given mwan4 strategy. Returns null if the strategy is not found. |
api.nftset(iface, family) |
Returns the nftset name for the given interface and address family ('4' or '6'). Use this instead of hardcoding set names. |
Example of adding elements to user sets:
return function(api) {
	if (!api.compat || api.compat < 29) return;

	let iface = 'wan';
	let set4 = api.nftset(iface, '4');
	let set6 = api.nftset(iface, '6');

	// Add an IPv4 address to the destination user set
	api.nft4('add element ' + api.table + ' ' + set4 + ' { 203.0.113.0/24 }');

	// Add an IPv6 address to the destination user set (only if IPv6 is enabled)
	api.nft6('add element ' + api.table + ' ' + set6 + ' { 2001:db8::/32 }');
};
How To Install
How To Install - OpenWrt 25.12 and newer
Please make sure that the requirements are satisfied and install pbr and luci-app-pbr from Web UI or connect to your router via ssh and run the following commands:
apk update
apk add pbr luci-app-pbr
How To Install - OpenWrt 24.10 and older
Please make sure that the requirements are satisfied and install pbr and luci-app-pbr from Web UI or connect to your router via ssh and run the following commands:
opkg update
opkg install pbr luci-app-pbr
Requirements
Default builds of OpenWrt 23.05 and later are fully compatible with pbr and require no additional packages. If you’re using a non-standard build, you may have to install the following packages on your router: resolveip, ip-full.
To satisfy the requirements, connect to your router via ssh and run the following commands:
opkg update; opkg install resolveip ip-full
How to install dnsmasq-full
If you want to use dnsmasq’s nft sets support, you will need to install dnsmasq-full instead of the dnsmasq. To do that, connect to your router via ssh and run the following commands:
opkg update
opkg install libnettle8 libnetfilter-conntrack3
cd /tmp/ && opkg download dnsmasq-full
opkg remove dnsmasq
opkg install dnsmasq-full --cache /tmp/
rm -f /tmp/dnsmasq-full*.ipk
Unmet dependencies
If you are running a development (trunk/snapshot) build of OpenWrt on your router and your build is outdated (meaning that packages of the same revision/commit hash are no longer available and when you try to satisfy the requirements you get errors), please flash either current OpenWrt release image or current development/snapshot image.
How to upgrade to a most recent version
If you’re on OpenWrt 23.05, OpenWrt 24.10 or snapshots and have been advised to upgrade to a pbr/luci-app-pbr versions more recent than what’s available in OpenWrt repositories, please add my packages repository to your OpenWrt device.
How to use
Helpful Instructional Videos
If you want to use WebUI to configure pbr you may want to review the following YouTube videos:
Service Configuration Settings
As per screenshots above, in the Web UI the pbr configuration is split into Basic, Advanced and WebUI settings. The full list of configuration parameters of pbr.config section is:
| Web UI Section | Parameter | Type | Default | Description |
|---|---|---|---|---|
| Basic | enabled | boolean | 0 | Toggles the initialization of the service and creation of rules, effectively acting as a master switch to enable or disable all policy routing without altering configuration. |
| Basic | verbosity | integer | 2 | Controls the logging level of the service, where higher values provide more detailed output to the system log and console for troubleshooting. |
| Basic | strict_enforcement | boolean | 1 | Drops traffic matching a policy if the target interface is down, functioning as a kill switch to prevent data leaks via the default gateway. See Strict enforcement for more details. |
| Basic | resolver_set | string | dnsmasq.nftset | Selects the mechanism for populating nft sets, where dnsmasq.nftset utilizes direct dnsmasq integration for high-performance, real-time domain routing. See Use Resolver’s Set Support and #7 for more details. Make sure the requirements are met. |
| Hidden | resolver_instance | list | * | Specifies a list of resolver instances (by index or name) to use for set population, allowing granular control when multiple resolver instances are active. |
| Basic | ipv6_enabled | boolean | 0 | Enables the loading of the pbr6 instance and processing of IPv6 nft chains, which is required for any IPv6 policies to take effect. |
| Advanced | supported_interface | list/string | Explicitly adds interfaces to be managed by pbr that might not be auto-detected, such as custom VPN tunnels or non-standard interfaces. |
|
| Advanced | ignored_interface | list/string | Specifies a list of interfaces that pbr should completely ignore, effectively preventing any policy routing manipulation on them. For more information on WireGuard server use cases, please review WireGuard Server Use Cases. |
|
| Advanced | icmp_interface | string | Forces all ICMP traffic (ping, traceroute) to use a specific interface, overriding default routing behavior for diagnostic traffic. | |
| Hidden | uplink_ip_rules_priority | integer | 30000 | Defines the starting priority for pbr’s IP rules, allowing you to position pbr routing logic before or after other network services in the routing table. Must be between 99 and 32765; out-of-range values are clamped and non-numeric values fall back to 30000. See A Word About uplink_ip_rules_priority before lowering it. |
| Advanced | uplink_mark | hexadecimal | 00010000 | Sets the specific firewall mark used by pbr to identify its traffic, which should be adjusted in conjunction with fw_mask to avoid conflicts with other services like SQM or QoS. It is also the step size between per-interface marks — see A Word About the Maximum Number of Interfaces/Tunnels. |
| Advanced | fw_mask | hexadecimal | 00ff0000 | Sets the firewall mask applied to pbr traffic, defining the bitmask used for mark matching, and must be configured carefully alongside uplink_mark. Together with uplink_mark it caps how many interfaces pbr can manage — see A Word About the Maximum Number of Interfaces/Tunnels. |
| Web UI | webui_show_ignore_target | boolean | 0 | Toggles the visibility of the ‘ignore’ target in the Web UI interface list, allowing for the creation of policies that explicitly bypass pbr processing. |
| Web UI | webui_supported_protocol | list | Defines the list of protocols displayed in the Web UI policies dropdown, allowing customization of the available protocol selection choices. | |
| {interface_name}_dscp | integer (1-63) | Dynamically enables DSCP-tag based policies for the specified interface, allowing traffic prioritization based on DSCP tags for that specific uplink/WAN or tunnel/VPN connection. | ||
| Hidden | procd_boot_trigger_delay | integer | 5000 | Sets the delay in milliseconds before the service reacts to interface boot-up triggers, allowing other dependent services or slow interfaces to fully initialize first. |
| Hidden | lan_device | list | br-lan | Overrides the default br-lan device detection, telling the service which physical or logical device represents your LAN for local network identification. |
| Hidden | procd_reload_delay | integer | 0 | Delays, in seconds, the start of the triggers set on all supported interfaces and executed on service reloads and configuration changes of PBR and Network. If interfaces are slow to come up (e.g., OpenVPN), if they depend on Network configuration changes, or if you experience race conditions, increasing this value to 5 or higher may be necessary. |
| Hidden | uplink_interface | string | wan | Explicitly defines the logical OpenWrt interface name used for upstream gateway calculations, which is necessary only if your primary IPv4 WAN interface is not named ‘wan’. |
| Hidden | uplink_interface6 | string | wan6 | Explicitly defines the logical OpenWrt interface name used for the upstream IPv6 gateway, necessary if your IPv6 WAN interface is not named ‘wan6’. |
| Hidden | nft_rule_counter | boolean | 0 | Enables packet counting for all generated nft rules, providing statistics on how many packets matched each specific policy rule. See nftables wiki for details. |
| Hidden | nft_set_auto_merge | boolean | 1 | Enables the auto-merge flag for nft sets, which automatically merges adjacent intervals to optimize set elements. See nftables wiki for details. |
| Hidden | nft_set_counter | boolean | 0 | Enables packet counting for all generated nft sets, providing statistics on traffic matching specific IP/network sets. See nftables wiki for details. |
| Hidden | nft_set_flags_interval | boolean | 1 | Enables the interval flag for nft sets, allowing them to contain ranges of IP addresses and netmasks rather than just single IPs. See nftables wiki for details. |
| Hidden | nft_set_flags_timeout | boolean | 0 | Enables the timeout flag on nft sets. On its own it changes nothing — elements added without an explicit timeout still never expire — so it is nft_set_timeout that actually ages entries out. See A Word About nft Set Timeouts and the nftables wiki for details. |
| Hidden | nft_set_gc_interval | string | Configures the garbage collection interval for nft sets, determining how frequently the system checks for and removes expired elements. Takes an nft time value (30s, 5m, 1h); see A Word About nft Set Timeouts and the nftables wiki for details. |
|
| Hidden | nft_set_policy | string | performance | Sets the memory policy for nft sets (e.g., ‘performance’ or ‘memory’), allowing optimization based on your device’s resources. See nftables wiki for details. |
| Hidden | nft_set_timeout | string | Defines the default timeout after which an element is removed from an nft set. Takes an nft time value (30s, 6h, 1h30m) and takes effect on its own, whether or not nft_set_flags_timeout is enabled; see A Word About nft Set Timeouts and the nftables wiki for details. |
|
| Hidden | nft_user_set_counter | boolean | 0 | Enables packet counting specifically for nft sets created from custom user files, aiding in debugging custom traffic rules. See nftables wiki for details. |
| Hidden | nft_user_set_policy | string | Sets the memory policy (performance or memory) for nft sets created from custom user files. When empty, the nft default is used. See nftables wiki for details. |
|
| Hidden | prefixlength | integer | 1 | Prefix length used for the suppress_prefixlength IP rule pbr installs on the main table, which makes the kernel skip default (and shorter-prefix) routes from main so pbr’s own tables can take over. Only change this if you understand ip rule suppress_prefixlength. |
| Hidden | debug_performance | boolean | 0 | Emits [PERF-DEBUG] timing lines to the log for each phase of a start/reload (config load, environment detection, interface enumeration, policy processing, nft rule installation). Useful for diagnosing slow starts, noisy otherwise. |
| Hidden | netifd_enabled | boolean | 0 | Enables deep integration with netifd, allowing pbr to directly interact with OpenWrt’s network interface daemon for more robust state management. |
| Hidden | netifd_strict_enforcement | boolean | 0 | Applies strict enforcement logic within the netifd integration context, ensuring traffic is dropped if the netifd interface is effectively down. |
| Hidden | netifd_interface_default | string | Specifies the default IPv4 interface mapping for netifd integration, ensuring the service correctly identifies the primary WAN within netifd structures. |
|
| Hidden | netifd_interface_default6 | string | Specifies the default IPv6 interface mapping for netifd integration, ensuring the service correctly identifies the primary IPv6 WAN. |
|
| Hidden | netifd_interface_local | list | Defines a list of interfaces considered ‘local’ by netifd, affecting how locally originated traffic is identified and routed. |
Default Settings
Default configuration has service disabled (use Web UI to enable/start service or run uci set pbr.config.enabled=1; uci commit pbr;).
Policy Options
Each policy may have a combination of the options below, the name and interface options are required.
The src_addr, src_port, dest_addr and dest_port options supports parameter negation, for example if you want to exclude remote port 80 from the policy, set dest_port to "!80" (notice lack of space between ! and parameter). A negated entry is an exclusion applied to the whole policy rather than a match of its own — see A Word About Negating Policy Options, which also covers the two cases where an exclusion is narrower than it looks.
| Option | Default | Description |
|---|---|---|
| name | Policy name, it must be set. | |
| enabled | 1 | Enable/disable policy. To display the Enable checkbox column for policies in the WebUI, make sure to select Enabled for Show Enable Column in the Web UI tab. |
| interface | Policy interface, it must be set. | |
| src_addr | List of space-separated local/source IP addresses, CIDRs, hostnames or mac addresses (colon-separated). You can also specify a local physical device (like a specially created wlan) prepended by an @ symbol. Versions 1.1.2 and later allow using URLs to list of addresses. If curl is installed you can use the file:// schema, otherwise you can use ftp://, http:// and https:// schemas (which are obviously not compatible with the secure_reload option). |
|
| src_port | List of space-separated local/source ports or port-ranges. | |
| dest_addr | List of space-separated remote/target IP addresses, CIDRs or hostnames/domain names. Versions 1.1.2 and later allow using URLs to list of addresses. If curl is installed you can use the file:// schema, otherwise you can use ftp://, http:// and https:// schemas. This is obviously not compatible with the secure_reload option. |
|
| dest_port | List of space-separated remote/target ports or port-ranges. | |
| proto | auto | Policy protocol. It qualifies the port match rather than matching on its own, so it only takes effect when src_port or dest_port is also set — see A Word About proto and Ports. Only tcp, udp, sctp, dccp and udplite can carry a port and are therefore the only usable values; from 1.2.3-r97 the WebUI offers only those, and the service reports anything that cannot work. |
| chain | prerouting | Policy chain, one of prerouting, forward or output. This setting is case-sensitive. input and postrouting are not supported — pbr creates no chain for them, so a policy naming one produces a rule nft cannot place and the whole ruleset is rejected. |
DNS Policy Options
Each policy may have a combination of the options below, the name, the src_addr and dest_dns options are required.
| Option | Default | Description |
|---|---|---|
| name | DNS Policy name, it must be set. | |
| enabled | 1 | Enable/disable DNS policy. To display the Enable checkbox column for policies in the WebUI, make sure to select Enabled for Show Enable Column in the Web UI tab. |
| src_addr | List of space-separated local/source IP addresses, CIDRs, hostnames or mac addresses (colon-separated). You can also specify a local physical device (like a specially created wlan) prepended by an @ symbol. You can use URLs to list of addresses. If curl is installed you can use the file:// schema, otherwise you can use ftp://, http:// and https:// schemas (which are obviously not compatible with the secure_reload option). |
|
| dest_dns | List of space-separated IPv4/IPv6 addresses for resolvers used for the DNS policy or a network interface, which DNS server(s) will be used for the DNS policy. | |
| dest_dns_port | Destination port of the resolver the traffic is redirected to. When unset, the original destination port is preserved (which is what you want for the standard DNS port 53); set it only when your resolver listens on a non-standard port. |
Custom User Files Include Options
| Option | Default | Description |
|---|---|---|
| path | Path to a custom user file (shell script or ucode .uc script), it must be set. |
|
| enabled | 1 | Enable/disable setting. |
Example Policies
Single IP, IP Range, Local Machine, Local MAC Address
The following policies route traffic from a single IP address, a range of IP addresses, a local machine (requires definition as DHCP host record in DHCP config), a MAC-address of a local device and finally all of the above via WAN.
config policy
  option name 'Local IP'
  option interface 'wan'
  option src_addr '192.168.1.70'

config policy
  option name 'Local Subnet'
  option interface 'wan'
  option src_addr '192.168.1.81/29'

config policy
  option name 'Local Machine'
  option interface 'wan'
  option src_addr 'dell-ubuntu'

config policy
  option name 'Local MAC Address'
  option interface 'wan'
  option src_addr '00:0F:EA:91:04:08'

config policy
  option name 'Local Devices'
  option interface 'wan'
  option src_addr '192.168.1.70 192.168.1.81/29 dell-ubuntu 00:0F:EA:91:04:08'
SIP Port
The following policy routes standard SIP port traffic via WAN for both TCP and UDP protocols.
config policy
  option name 'SIP Ports'
  option interface 'wan'
  option dest_port '5060'
  option proto 'tcp udp'
Plex Media Server
The following policies route Plex Media Server traffic via WAN. Please note, you’d still need to open the port in the firewall either manually or with the UPnP.
config policy
  option name 'Plex Local Server'
  option interface 'wan'
  option src_port '32400'

config policy
  option name 'Plex Remote Servers'
  option interface 'wan'
  option dest_addr 'plex.tv my.plexapp.com'
Emby Media Server
The following policy route Emby traffic via WAN. Please note, you’d still need to open the port in the firewall either manually or with the UPnP.
config policy
  option name 'Emby Local Server'
  option interface 'wan'
  option src_port '8096 8920'

config policy
  option name 'Emby Remote Servers'
  option interface 'wan'
  option dest_addr 'emby.media app.emby.media tv.emby.media'
Ignore Target
The service allows you to set an interface for a specific policy to ignore to skip further processing of matched traffic. This option needs to be explicitly enabled for use in WebUI, check Service Configuration Settings for details. Some use cases are listed below.
Ignore Requests
The following policy allows you to skip processing some requests (like traffic to an OpenVPN or WireGuard server running on the router):
config pbr 'config'
  ...
  option webui_show_ignore_target '1'

config policy
  option name 'Ignore Local Requests by Destination'
  option interface 'ignore'
  option dest_addr '192.168.200.0/24'
Please note, you need to enable Show Ignore Target option for the WebUI to listignore\ in the list of gateways.
It’s a good idea to keep the policies targeting ignore interface at the top of the config file/list of policies displayed in WebUI to make sure they are processed first.
Netflix Domains
The following policy should route US Netflix traffic via WAN. For capturing international Netflix domain names, you can refer to the getdomainnames.sh-specific instructions on GitHub/jsDelivr and don’t forget to adjust them for OpenWrt. This may not work if Netflix changes things. For more reliable US Netflix routing you may want to consider also using custom user files.
config policy
  option name 'Netflix Domains'
  option interface 'wan'
  option dest_addr 'amazonaws.com netflix.com nflxext.com nflximg.net nflxso.net nflxvideo.net dvd.netflix.com'
Example Custom User Files Includes
config include
  option path '/usr/share/pbr/pbr.user.dnsprefetch'
  option enabled '0'

config include
  option path '/usr/share/pbr/pbr.user.aws.uc'
  option enabled '0'

config include
  option path '/usr/share/pbr/pbr.user.netflix.uc'
  option enabled '0'
Example OpenWrt Configurations for More Complex Cases
WireGuard Server Use Cases
Yes, I’m aware that in terms of topology there are no clients nor servers in WireGuard, it’s all peers. However, if one of the WireGuard instances has the listen_port, we’d call this one a server and if it doesn’t have the listen_port, then it’s a client.
The pbr service automatically detects the WireGuard server and without any customizations the default behaviour is:
- do not show the WireGuard server interfaces in the list of interfaces available for policies/DSCP tagging.
- to create an ip rule to send traffic from WireGuard server over WAN to ensure that your WireGuard server is still accessible/functional even if your default gateway is a tunnel and not a WAN connection.
However, there could be use cases where this default behaviour is not desired and needs to be altered, they are addressed below
WireGuard Server Use Case: Targeting in Policies
If you need to target the WireGuard server in policies, please add its interface name to Supported Interface option. That way the ip rule to send traffic from WireGuard server over WAN will still be automatically created, but the WireGuard server name will appear/can be targeted in policies.
WireGuard Server Use Case: Disable IP Rule for WAN
If you need to send the WireGuard server traffic over default gateway (and not WAN), in other words you want to disable the automatic ip rule to send traffic from WireGuard server over WAN, add the WireGuard server interface name to Ignored Interface option.
WireGuard Server Use Case: Targeting in Policies and Disable IP Rule for WAN
If you need to target the WireGuard server in policies and you need to send the WireGuard server traffic over default gateway (and not WAN), add the WireGuard server interface name to both Supported Interface and Ignored Interface options.
Basic OpenVPN Client Config
There are multiple guides online on how to configure the OpenVPN client on OpenWrt “the easy way”, and they usually result either in a kill-switch configuration or configuration where the OpenVPN tunnel cannot be properly (and separately from WAN) routed, either way, incompatible with the Policy-Based Routing.
Below is the sample OpenVPN client configuration for OpenWrt which is guaranteed to work. If you have already deviated from the instructions below (ie: made any changes to any of the wan or lan configurations in either /etc/config/network or /etc/config/firewall), you will need to start from scratch with a fresh OpenWrt install.
Relevant part of /etc/config/pbr:
config pbr 'config'
  list supported_interface 'vpnclient'
  ...
The recommended network/firewall settings are below.
For 25.12 and earlier branches using luci-app-openvpn the relevant part of /etc/config/network (DO NOT modify default OpenWrt network settings for either wan or lan):
config interface 'vpnclient'
  option proto 'none'
  option device 'ovpnc0'
For master branch using luci-proto-vpn you only need to set the device option (option dev) in the OpenVPN interface.
Relevant part of /etc/config/firewall:
config zone
  option name 'wan'
  list network 'wan'
  list network 'vpnclient'
  ...
Relevant part of /etc/config/openvpn (configure the rest of the client connection for your specifics by either referring to an existing .ovpn file or thru the OpenWrt uci settings):
config openvpn 'vpnclient'
  option enabled '1'
  option client '1'
  option dev_type 'tun'
  option dev 'ovpnc0'
  ...
Multiple OpenVPN Clients
If you use multiple OpenVPN clients on your router, the order in which their devices are named (tun0, tun1, etc) is not guaranteed by OpenWrt. The following settings are recommended in this case.
For /etc/config/network:
config interface 'vpnclient0'
  option proto 'none'
  option device 'ovpnc0'

config interface 'vpnclient1'
  option proto 'none'
  option device 'ovpnc1'
For /etc/config/openvpn:
config openvpn 'vpnclient0'
  option client '1'
  option dev_type 'tun'
  option dev 'ovpnc0'
  ...

config openvpn 'vpnclient1'
  option client '1'
  option dev_type 'tun'
  option dev 'ovpnc1'
  ...
For /etc/config/pbr:
config pbr 'config'
  list supported_interface 'vpnclient0 vpnclient1'
  ...
Local OpenVPN Server + OpenVPN Client (Scenario 1)
If the OpenVPN client on your router is used as default routing (for the whole Internet), make sure your settings are as following (three dots on the line imply other options can be listed in the section as well).
Relevant part of /etc/config/pbr:
config pbr 'config'
  list ignored_interface 'vpnserver'
  ...

config policy
  option name 'OpenVPN Server'
  option interface 'wan'
  option proto 'tcp'
  option src_port '1194'
  option chain 'output'
The network/firewall/openvpn settings are below.
Relevant part of /etc/config/network (DO NOT modify default OpenWrt network settings for either wan or lan):
config interface 'vpnclient'
  option proto 'none'
  option device 'ovpnc0'

config interface 'vpnserver'
  option proto 'none'
  option device 'ovpns0'
  option auto '1'
Relevant part of /etc/config/firewall:
config zone
  option name 'lan'
  list network 'lan'
  list network 'vpnserver'
  ...

config zone
  option name 'wan'
  list network 'wan'
  list network 'vpnclient'
  ...

config rule
  option name 'Allow-OpenVPN-Inbound'
  option target 'ACCEPT'
  option src '*'
  option proto 'tcp'
  option dest_port '1194'
Relevant part of /etc/config/openvpn:
config openvpn 'vpnclient'
  option client '1'
  option dev_type 'tun'
  option dev 'ovpnc0'
  option proto 'udp'
  option remote 'some.domain.com 1197' # DO NOT USE PORT 1194 for VPN Client
  ...

config openvpn 'vpnserver'
  option port '1194'
  option proto 'tcp'
  option server '192.168.200.0 255.255.255.0'
  ...
Local OpenVPN Server + OpenVPN Client (Scenario 2)
If the OpenVPN client is not used as default routing and you create policies to selectively use the OpenVPN client, make sure your settings are as following (three dots on the line imply other options can be listed in the section as well). Make sure that the policy mentioned below is at the top of your policies list.
Relevant part of /etc/config/pbr:
config pbr 'config'
  list ignored_interface 'vpnserver'
  ...
config policy
  option name 'Ignore Local Traffic'
  option interface 'ignore'
  option dest_addr '192.168.200.0/24'
  ...
The network/firewall/openvpn settings are below.
Relevant part of /etc/config/network (DO NOT modify default OpenWrt network settings for either wan or lan):
config interface 'vpnclient'
  option proto 'none'
  option device 'ovpnc0'

config interface 'vpnserver'
  option proto 'none'
  option device 'ovpns0'
  option auto '1'
Relevant part of /etc/config/firewall:
config zone
  option name 'lan'
  list network 'lan'
  list network 'vpnserver'
  ...

config zone
  option name 'wan'
  list network 'wan'
  list network 'vpnclient'
  ...

config rule
  option name 'Allow-OpenVPN-Inbound'
  option target 'ACCEPT'
  option src '*'
  option proto 'tcp'
  option dest_port '1194'
Relevant part of /etc/config/openvpn:
config openvpn 'vpnclient'
  option client '1'
  option dev_type 'tun'
  option dev 'ovpnc0'
  option proto 'udp'
  option remote 'some.domain.com 1197' # DO NOT USE PORT 1194 for VPN Client
  list pull_filter 'ignore "redirect-gateway"' # for OpenVPN 2.4 and later
  option route_nopull '1' # for OpenVPN earlier than 2.4
  ...

config openvpn 'vpnserver'
  option port '1194'
  option proto 'tcp'
  option server '192.168.200.0 255.255.255.0'
  ...
Footnotes/Known Issues
-
If your
OpenVPNinterface has the device name different from tun*, is not up and is not explicitly listed insupported_interfaceoption, it may not be available in the policiesInterfacedrop-down within WebUI. -
If your default routing is set to the VPN tunnel, then the true WAN interface cannot be discovered using OpenWrt built-in functions, so service will assume your network interface ending with or starting with
wanis the true WAN interface. -
The service does NOT support the “killswitch” router mode (where there is no firewall forwarding from
laninterface towaninterface, so if you stop the VPN tunnel, you have no Internet connection). For proper operation, leave all the default OpenWrtnetworkandfirewallsettings forlanandwanintact. -
When using the
dnsmasq.nftsetoption, please make sure to flush the DNS cache of the local devices, otherwise domain policies may not work until you do. If you’re not sure how to flush the DNS cache (or if the device/OS doesn’t offer an option to flush its DNS cache), reboot your local devices when starting to use the service and/or when connecting data-capable device to your WiFi. Alternatively, you could enable the custom user filepbr.user.dnsprefetchto resolve the destination domain names in advance, see Resolving Domain Names in Advance (requires the service version 1.2.3 or later). Note that doing so will negate one of the advantages#7 of usingdnsmasq.nftset. -
When using the policies targeting physical devices, you may need to make sure you have the following packages installed:
kmod-br-netfilter,kmod-ipt-physdevandiptables-mod-physdev. Also, if your physical device is a part of the bridge, you may have to setnet.bridge.bridge-nf-call-iptablesto1in your/etc/sysctl.conf. -
If you’re using domain names in the
dest_addroption of the policy, it is recommended to use thednsmasq.nftsetoption forresolver_set. Otherwise, the domain name will be resolved when the service starts up and the resolved IP address(es) will be added to an apropriate set or aniptablesornftrule. Resolving a number of domains on start is a time consuming operation, while using thednsmasq.nftsetoption allows transparent and fast addition of the correct domain IP addresses to the apropriate set on DNS request or when resolver is idle. -
When service is started, it subscribes to the supported interfaces updates thru the PROCD. While I was never able to reproduce the issue, some customers report that this method doesn’t always work in which case you may want to set up iface hotplug script to reload service when the relevant interface(s) are updated.
-
The route the service installs for an interface with no gateway is of the
unreachabletype, so the kernel answers rather than staying silent: a client whose traffic is sent there gets an immediate ICMP host-unreachable and its connections fail at once with a clear error, which is usually easier to diagnose than a connection that hangs. If you would rather the traffic were dropped silently – so that an application waits for a timeout instead of noticing and failing over – replace the route with one of theblackholetype. Doing that by hand does not last, since the service replaces the route on every start and reload, so use a shell custom user file, which runs after routing has been set up. It has to be the shell variant: the ucode custom user file API is givennftadd-rule calls only and cannot touch routes.# /etc/pbr.d/blackhole.sh grep -q "[[:space:]]pbr_blackhole$" /etc/iproute2/rt_tables || return 0 ip -4 route replace blackhole default table pbr_blackhole ip -6 route replace blackhole default table pbr_blackhole 2>/dev/null
FAQ
You may find some useful information below.
A Word About Default Routing
Service does not alter the default routing. Depending on your VPN tunnel settings (and settings of the VPN server you are connecting to), the default routing might be set to go via WAN or via VPN tunnel. This service affects only routing of the traffic matching the policies. If you want to override default routing, follow the instructions below.
OpenVPN tunnel configured via uci (/etc/config/openvpn)
To unset an OpenVPN tunnel as default route, set the following to the appropriate section of your /etc/config/openvpn:
-
For OpenVPN 2.4 and newer client config:
list pull_filter 'ignore "redirect-gateway"' -
For OpenVPN 2.3 and older client config:
option route_nopull '1' -
For your WireGuard (client) config:
option route_allowed_ips '0'
OpenVPN tunnel configured with .ovpn file
To unset an OpenVPN tunnel as default route, set the following to the appropriate section of your .ovpn file:
-
For OpenVPN 2.4 and newer client
.ovpnfile:pull-filter ignore "redirect-gateway" -
For OpenVPN 2.3 and older client
.ovpnfile:route-nopull
WireGuard tunnel
To unset a WireGuard tunnel as default route, set the following to the appropriate section of your /etc/config/network:
-
For your WireGuard (client) config:
option route_allowed_ips '0' -
Routing WireGuard traffic may require setting
net.ipv4.conf.wg0.rp_filter = 2in/etc/sysctl.conf. Please refer to issue #41 for more details.
A Word About Cloudflare’s 1.1.1.1 App
Cloudflare has released an app for iOS and Android, which can also be configured to route traffic thru their own VPN tunnel (WARP+).
If you use Cloudflare’s VPN tunnel (WARP+), none of the policies you set up with the VPN Policy Routing will take effect on your mobile device. Disable WARP+ for your home WiFi to keep VPN Policy Routing affecting your mobile device.
If you just use the private DNS queries (WARP), A Word About DNS-over-HTTPS applies. You can also disable WARP for your home WiFi to keep VPN Policy Routing affecting your mobile device.
A Word About DNS-over-HTTPS
Some browsers, like Mozilla Firefox or Google Chrome/Chromium have DNS-over-HTTPS proxy built-in. Their requests to web-sites listed in policies cannot be properly routed if the resolver_set is set to dnsmasq.nftset. To fix this, you can try either of the following:
-
Disable the DNS-over-HTTPS support in your browser and use the OpenWrt’s
net/https-dns-proxy(README on GitHub/jsDelivr) package with optionalluci-app-https-dns-proxyWebUI/luci app. You can then continue to usednsmasq.nftsetsetting for theresolver_setin Policy-Based Routing. -
Continue using DNS-over-HTTPS in your browser (which, by the way, also limits your options for router-level AdBlocking as described in
net/adblock-fastREADME on GitHub/jsDelivr), you than would either have to switch theresolver_settonone. Please note, you will lose all the benefits of the Resolver Set Support option.
A Word About HTTP/3 (QUIC)
If you want to target traffic using HTTP/3 protocol, you can use the AUTO as the protocol (the policy will be either protocol-agnostic or TCP/UDP) or explicitly use UDP as a protocol.
A Word about a Modem interface alongside a WAN interface
Adding an additional interface (e.g., a modem interface) to wan/wan6 may cause issues if it is enabled during boot. If this occurs, do not bring up the additional interface at boot. Instead, enable it manually or via a hotplug script after the system has started.
A Word about IPv6 and PPPoE
If you encounter problems with IPv6 when using PPPoE, use option ipv6 '1' and create your own wan6 interface.
A Word About Routing Netflix/Amazon Prime/Hulu Traffic
There are two following scenarios with VPN connections and Netflix/Amazon Prime/Hulu traffic.
Routing Netflix/Amazon Prime/Hulu Traffic via VPN Tunnel
If you live in a country where Netflix, Amazon Prime, Hulu or any other streaming service you want to access are not available and/or you want to circumvent geo-fencing, this package can’t help you. The streaming services do a great job detecting VPN usage when accessing them and circumventing geographical restrictions is not only dubiously legal, it’s also technically very challenging.
Routing Netflix/Amazon Prime/Hulu Traffic via WAN
If you live in a country where Netflix, Amazon Prime, Hulu or any other streaming service you want to access are available, you obviously do NOT want to use VPN tunnel for their traffic.
If the VPN tunnel is not used as a default gateway on your router, you should not have a problem accessing Netflix, Amazon Prime, Hulu or other streaming services (just make sure that your DNS requests are not routed via VPN tunnel either).
If the VPN tunnel is used as a default gateway, either:
- send ALL traffic from your multimedia devices (by using their IP addresses or device names in the
src_addroption in config file or Local addresses /devices field in WebUI) accessing Netflix, Amazon Prime, Hulu or other streaming services to WAN; this is the more reliable and recommended method. - use the Netflix/AWS custom user files in combination with the Netflix, Amazon Prime, Hulu domains and
dnsmasq.nftsetoption to route traffic to Netflix/Amazon via WAN; this is definitely less reliable method and may not work in all regions.
Either way make sure that your DNS requests are not routed via VPN Tunnel!
A Word About Interface Hotplug Script
Sometimes#8 the service doesn’t get reloaded when supported interfaces go up or down. This can be an annoying experience since the service may start before all supported VPN connections are up and then not get updated when the VPN connections get established. In that case, run the following command from CLI to create the interface hotplug script to cause the service to be reloaded in interface updates:
mkdir -p /etc/hotplug.d/iface/
cat << 'EOF' > /etc/hotplug.d/iface/70-pbr
#!/bin/sh
logger -t pbr "Reloading $INTERFACE due to $ACTION of $INTERFACE ($DEVICE)"
/etc/init.d/pbr on_interface_reload "$INTERFACE"
EOF
A Word About Broken Domain Policies
For the domain policies to successfully work, you need:
- a
dnsmasq-fullinstalled on your router. - a
pbrversion compatible with thednsmasq-full. - a policy containing domain name(s) defined in the
pbrconfig. - a local (LAN/WLAN) client to make a DNS request to your router to resolve the domain(s) defined in the
pbrpolicy.
Some examples on when the domain(s) policies defined in pbr may not work:
- when regular
dnsmasqand notdnsmasq-fullis installed. - installed
pbris not compatible with the installeddnsmasq-full(ie:dnsmasq-fullsupports nft sets, but you havepbr-iptablesinstalled). - you don’t have a policy containing domain name(s) defined in the
pbrconfig. - you have a DNS Policy set for a local device, so its DNS requests are not being sent to
dnsmasq-full. - you have a domain name(s) based policy configured for LAN device(s), but are testing from the LAN device which is not affected by the policy or testing from the router.
- a local (LAN/WLAN) client does not make a DNS request to your router, this is probably the most common cause and there could be a few reasons for the DNS requests to not reach router:
- a local client has the DNS response cached, solved by rebooting the client.
- a local client is set to use a DNS different from router thru option 6 defined in router
dhcpsettings, solved by editing your router’sdhcpconfig. - a local client is set to use a DNS different from router thru the DNS explicitly set on client, solved by removing explicit DNS set on client.
- a local client is set to use an ecnrypted DNS, solved by disabling use of encrypted DNS requests.
- a local client uses the hardcoded DNS servers which you cannot edit, solved by enabling DNS hijacking on your router.
A Word About proto and Ports
proto is a port qualifier, not a match of its own. It tells pbr which
transport protocol the ports in src_port/dest_port belong to, and it only
ever reaches the generated rule attached to one of them. The defaulting shows
the intent: leave proto unset and it becomes tcp udp when a port is present,
and all when it is not.
Two consequences, both of which used to happen silently.
proto without a port does nothing. The protocol is dropped from the rule
and the policy routes every protocol, not the one you asked for. If you want
“all UDP to this destination”, give it the full port range:
uci set pbr.@policy[-1].proto='udp'
uci set pbr.@policy[-1].dest_port='0-65535'
uci commit pbr
Only five protocols can carry a port at all — tcp, udp, sctp, dccp
and udplite. Everything else in /etc/protocols (icmp, igmp, gre,
esp, ah, ipv6-icmp and the rest) cannot be used in a policy: without a
port it is ignored, and with a port pbr emits a rule such as
icmp dport { 53 } which nft refuses — and because the whole file is
validated in one pass, the service fails to start and nothing routes.
At a glance, for a policy that is otherwise identical:
proto |
port | what the rule matches |
|---|---|---|
udp |
(none) | everything — the protocol is dropped |
udp |
0-65535 |
all UDP — this is how you say “all of this protocol” |
tcp |
53 |
TCP port 53 only |
icmp |
(none) | everything — ICMP cannot be matched by a policy at all |
icmp |
53 |
nothing: nft refuses icmp dport { 53 } and the service does not start
|
From 1.2.3-r97 neither passes unnoticed: a proto that cannot take effect
is reported as a warning, and a protocol given a port it cannot have is rejected
with an error so the rest of the ruleset survives. The WebUI dropdown offers
only the five usable values from that release too, keeping any value an existing
policy already holds so opening the page does not silently change it.
On 1.2.3-r95 there is no such reporting — both cases are silent, so a policy that looks right can be routing far more than you intended, or stopping the service outright. Nothing needs migrating: the configurations described above behave the same before and after, you are simply told about them from r97. If you are on r95, the last row of the table is the one to check for by hand. (There is no r96; the 1.2.3 series numbers releases in twos.)
To route ICMP, do not use a policy. Set icmp_interface — Default ICMP Interface on the WebUI’s Advanced Configuration tab — which sends all ICMP out of the interface you choose. Note it is a single global setting: unlike a policy it cannot say “ICMP for these clients only”.
A Word About nft Set Timeouts
nft_set_flags_timeout, nft_set_timeout and nft_set_gc_interval make the addresses in pbr’s sets expire, which is the usual answer to the fact that a domain policy’s set otherwise only grows. They apply to the named sets pbr creates — the dnsmasq-populated domain sets and the per-interface user sets — and not to the addresses written inline into a rule, so a policy built from plain subnets, ports or MAC addresses is unaffected by them.
Growth is not the only reason to reach for them. A set’s contents survive a service run: pbr deletes only the sets its new ruleset no longer declares, and flushes a set only when that policy’s domain list has changed. So an address a domain has stopped using is never removed on its own — a service that rotates its addresses leaves behind entries the policy carries on routing, and nothing reports it. A timeout is the only thing that ages those out. It became usable in 1.2.3-r95: up to and including 1.2.3-r93 any value at all stopped the service from starting, so this remedy was documented but could not actually be applied.
There are four things worth knowing before turning them on.
The value has to be an nft time value. That is a run of <decimal><unit>, where the unit is one of ms, s, m, h or d: 30s, 10m, 6h, 2d, 1h30m are all fine. There is no unit for weeks, so 1w is refused, and a bare number such as 60 is refused as well — the unit is not optional. From 1.2.3-r95 a value nft cannot parse is ignored and the set is simply created without it. Up to and including 1.2.3-r93 the unusable value reached the ruleset, nft rejected the whole file, and pbr failed to start with ERROR: Failed to install fw4 nft file — so on those older releases, check the value before enabling either option.
A timeout does not need the flag. Setting nft_set_timeout alone is enough — the elements expire whether or not nft_set_flags_timeout is also enabled.
Expiry is counted from when the address was first added, and a new DNS lookup does not reset it. Re-adding an address that is already in a set succeeds without error but leaves the countdown alone. So with nft_set_timeout set to 6h, an address is removed six hours after it first appeared no matter how much traffic uses it or how often the name is looked up, and it only returns the next time a client resolves that name through the router. Between the two there is a window in which the policy does not match that address — the same gap described under broken domain policies, reopening on a timer. A short timeout keeps the set tidy at the cost of hitting that window more often.
Changing any of these settings needs the firewall restarted, not just pbr. pbr’s sets outlive service pbr stop: the include file is removed but the sets stay in the live inet fw4 table, so the next start tries to create a set that already exists with different attributes and stops with Error: Could not process rule: File exists. Apply a change with:
service pbr stop
service firewall restart
service pbr start
or simply reboot. Restarting pbr on its own is not enough: the sets are still in the live table, so the start fails again with the same error. This is not specific to the timeout options — it applies to any change of a set attribute, nft_set_counter and nft_set_policy included.
If you just want a setting. This needs 1.2.3-r95 or later; on r93 and earlier it stops pbr from starting. For a domain policy routing anything that moves around — a CDN, a service behind a load balancer, anything with a short DNS TTL — set a day and leave the other two options alone:
uci set pbr.config.nft_set_timeout='24h'
uci commit pbr
then apply it with the restart above. A day is long enough that the expiry window rarely bites, and short enough that an address a service has stopped using does not linger indefinitely. Note what this does and does not fix: the domain keeps working either way, because the new address is added the next time a client resolves the name through the router. What you are clearing up is the leftovers. Without a timeout every address a domain has ever resolved to stays in the set for as long as the router is up, so the set grows without bound — and if one of those addresses is later reassigned to somebody else, traffic to it carries on being routed by this policy, with nothing left to connect it to the domain that put it there. That is a slow leak rather than a fault, which is why this is a recommendation and not a default.
A Word About Compatibility With Other Policy Routing Services
Using pbr together with another policy routing service on the same system may or may not be possible, depending on how the other service works, and can lead to conflicts. One way to resolve those is changing the uplink_ip_rules_priority option. For example, setting it to 900 will allow using pbr for policy routing and mwan3 for WAN failover or load balancing.
A Word About uplink_ip_rules_priority
The uplink_ip_rules_priority option sets the base priority of the ip rule entries pbr installs. pbr does not use a single priority: it reserves a window of priorities below the configured base, one per possible marked interface. The size of that window is derived from fw_mask divided by uplink_mark — with the defaults (00ff0000 / 00010000) that is 255 priorities. On start and on every reload pbr clears that whole window before re-adding its own rules.
Two consequences worth knowing before you change the value:
-
Do not set the base lower than the window size. Accepted values are
99to32765; anything outside that range is clamped on load, and a non-numeric value falls back to30000. Older versions ofpbr1.2.3 would let a low value push the cleanup window down to priority0, deleting the kernel’s ownfrom all lookup localrule and making the router stop answering on its own addresses. That is fixed — the window can no longer reach priority0— but a low base still means a wide window sitting near the bottom of the rule table. -
The cleanup removes every rule in the window, not just
pbr’s. Onlynetifd-ownedpbrtables are exempt. If another service installsip ruleentries in that range, apbrreload will remove them. For examplenetbirdinstalls rules starting at priority100; withuplink_ip_rules_priority=99the window is[1, 100]andnetbird’s rule is inside it. Checkip rule show(andip -6 rule show) after apbrrestart if you run another service that manages IP rules.
If you are lowering the base to get pbr ahead of another service, lower it only as far as you need, and prefer raising the other service’s priorities where that is an option.
A Word About the Maximum Number of Interfaces/Tunnels
Every interface pbr manages consumes one firewall mark and one IP rule priority, and the two are allocated from opposite ends:
- Marks count up from uplink_mark in steps of
uplink_mark, and an interface is rejected once its mark would exceed fw_mask (ERROR: Interface mark for 'X' exceeds the fwmask value). - Priorities count down from uplink_ip_rules_priority, one per interface, and must stay above
0— priority0is the kernel’s ownfrom all lookup localrule.
So the ceiling is whichever of the two runs out first:
max_interfaces = min( fw_mask / uplink_mark , uplink_ip_rules_priority )
with fw_mask and uplink_mark taken as their integer (decimal) values. With the defaults:
fw_mask                  = 0x00ff0000 = 16711680
uplink_mark              = 0x00010000 =    65536
uplink_ip_rules_priority =                 30000

max_interfaces = min( 16711680 / 65536, 30000 )
               = min( 255, 30000 )
               = 255
It is 255 rather than 256 because the first interface is assigned uplink_mark itself, not 0, so the usable marks are 1 × uplink_mark through 255 × uplink_mark.
A few consequences of the formula:
- With the defaults the mask is the binding term (255 vs 30000), which is why the limit is usually quoted as “255 tunnels”.
-
uplink_markshould be the lowest set bit offw_mask. Settinguplink_mark=00020000while leavingfw_mask=00ff0000halves the ceiling to 127 for no benefit. -
Lowering
uplink_ip_rules_prioritycan make the priority the binding term. At the minimum of99the ceiling drops to 99 interfaces.
Raising the ceiling
Widening the mask raises the first term — fw_mask=ffff0000 with uplink_mark=00010000 gives 65535 mark slots — at which point the priority term binds and the practical maximum becomes uplink_ip_rules_priority, up to its own maximum of 32765.
Do not do this just to have headroom. The cleanup window pbr clears on every start and reload is sized by fw_mask / uplink_mark, not by how many interfaces you actually have (see A Word About uplink_ip_rules_priority). With the defaults that window is 255 priorities wide. With fw_mask=ffff0000 it becomes 65535 wide, which after clamping means pbr deletes every IP rule between priority 1 and uplink_ip_rules_priority + 1 on each reload, whether or not pbr created it. On a router that also runs mwan3, netbird, WireGuard or any other service that installs IP rules, that is a very large blast radius.
Additionally, in netifd integration mode the LAN rules are installed at uplink_ip_rules_priority + 1000 and upwards. Keep uplink_ip_rules_priority at or below roughly 31000 in that mode, otherwise those rules land beyond the kernel’s main (32766) and default (32767) rules and are never reached.
The practical recommendation is to leave fw_mask and uplink_mark at their defaults unless you genuinely need more than 255 routed interfaces, which is far beyond what any normal deployment uses.
A Word About Negating Policy Options
The src_addr, dest_addr, src_port and dest_port options accept negated entries, written with a ! immediately before the value and no space after it. A negated entry is an exclusion applied to the whole policy, not a match in its own right.
Positive entries are combined with OR, negated entries with AND:
config policy
  option name 'lan-to-wan'
  option interface 'wan'
  option src_addr '192.168.1.0/24 10.0.0.0/24 @br-lan @br-guest !192.168.1.5'
routes traffic coming from 192.168.1.0/24 or 10.0.0.0/24 or the br-lan and br-guest devices, in every case except traffic from 192.168.1.5.
A policy made up of negated entries alone is a valid catch-all: dest_port '!80' means “every destination port except 80”.
Why one policy produces several nft rules
nft has no OR between the match expressions of a single rule — everything in a rule must match at once. So each type of positive entry (physical device, MAC address, domain, IPv4, IPv6) becomes a rule of its own, and the policy’s exclusions are repeated on each of them. nft list chain inet fw4 pbr_prerouting shows the policy above as:
iifname { "br-lan", "br-guest" } ip saddr != 192.168.1.5 goto pbr_mark_0x010000 comment "lan-to-wan"
meta nfproto ipv6 iifname { "br-lan", "br-guest" } goto pbr_mark_0x010000 comment "lan-to-wan"
ip saddr { 10.0.0.0/24, 192.168.1.0/24 } ip saddr != 192.168.1.5 goto pbr_mark_0x010000 comment "lan-to-wan"
This is expected. Several rules per policy does not mean the policy has been duplicated.
The meta nfproto ipv6 on the second rule is there because iifname says nothing about the address family: without it, that rule would also match the IPv4 packets the first rule just excluded, letting 192.168.1.5 back into the policy. pbr adds the matching meta nfproto ipv4 to the first rule as well, but nft does not print it — the ip saddr match already implies it.
An exclusion only applies within its own address family
!192.168.1.5 is an IPv4 address, so it can only be compared against an IPv4 source and is attached only to the policy’s IPv4 rules. The same host’s IPv6 traffic is unaffected and is still routed by the policy — that is the second rule in the listing above, which carries no exclusion at all.
To exclude a dual-stack host completely, either exclude it by MAC address, or list both its IPv4 and its IPv6 address as separate negated entries.
A MAC exclusion restricts the whole policy to Ethernet traffic
ether saddr reads the source MAC out of the packet’s Ethernet header. In nft, matching a header field that is not present in the packet is a non-match, and that applies to != exactly as it does to =. A rule carrying ether saddr != ... therefore never matches a packet that arrived without an Ethernet header.
Because exclusions are attached to every rule of the policy, adding a MAC exclusion constrains the policy’s other rules too — including the ones that match on IP addresses:
config policy
  option name 'subnet-to-wan'
  option interface 'wan'
  option src_addr '192.168.9.0/24 !11:22:33:44:55:66'
ip saddr 192.168.9.0/24 ether saddr != 11:22:33:44:55:66 goto pbr_mark_0x010000 comment "subnet-to-wan"
That rule only matches traffic that reached the router over an Ethernet-like interface — a bridge, a LAN port, WiFi. Traffic arriving over a tunnel (WireGuard, OpenVPN tun, GRE and similar) has no Ethernet header, so the policy will not match it at all, even though the source address is in 192.168.9.0/24.
If a policy’s sources can arrive over a tunnel, do not exclude by MAC address. Exclude the host by IP address instead, or move the MAC exclusion into a separate policy targeting the ignore interface, placed above this one.
A positive MAC entry carries the same requirement, which is unsurprising: you cannot match a MAC address on a packet that has no Ethernet header.
Negated domain names
Domain entries are matched by address, not by name. pbr has dnsmasq add every address it resolves for a domain to an nft set, and the rule matches on that set. A negated domain gets a second set of its own, so the rule reads “in the policy’s set, but not in the exclusion set”.
An entry for example.com catches example.com and all of its subdomains (see Use DNSMASQ nft sets Support) — but only where no more specific entry exists, because dnsmasq applies the most specific matching entry rather than every matching one. That is what makes the useful case work:
config policy
  option name 'example-to-wan'
  option interface 'wan'
  option dest_addr 'example.com !ads.example.com'
ads.example.com is the more specific entry of the two, so a lookup for it goes to the exclusion set and its addresses never enter the policy’s set at all. The policy routes the rest of example.com and leaves that traffic alone.
Note where the work happens: for a subdomain exception the carve-out is done by dnsmasq, when it decides which set an answer belongs in — not by the != in the nft rule. The != earns its place in the other arrangements: a negated domain alongside non-domain entries such as a subnet or a port, or a policy consisting of the negation alone.
Excluding a domain unrelated to anything the policy matches does nothing. The two sets never come to hold the same addresses, so there is nothing for the exclusion to remove. A negated domain is only meaningful where it can overlap something the policy already matches — in practice a subdomain of a domain the policy covers, or an address the policy matches for another reason such as a subnet or a port.
Three things to be aware of:
-
Addresses, not names. If the excluded name resolves to the same address as the domain you are routing — a shared CDN front end, several sites on one host — that address lands in both sets, and the exclusion removes the parent domain along with it. Nothing warns you when this happens. For example
dest_addr 'google.com !drive.google.com'does nothing useful: both names answer with the same address, so it ends up in both sets and the rule matches neither name. The exception is dependable only when the excluded name has addresses of its own, as an advertising or telemetry subdomain usually does. -
An exclusion is empty until the name has been resolved through the router. An empty set excludes nothing, so traffic you meant to carve out is routed by the policy until a local client looks the name up via the router’s
dnsmasq. For a positive domain policy the same delay only means the policy has not started working yet; for an exclusion it means the exclusion leaks. Thepbr.user.dnsprefetchcustom user file resolves policy domains in advance and avoids this, as long as the addresses do not change afterwards, and #5 applies here as well. -
The sets only grow. Unless nft_set_timeout is set, an address is never removed once added — see A Word About
nftSet Timeouts for what enabling it involves. A service that rotates its addresses keeps presenting ones the exclusion set has not seen, and those leak into the policy until they too are resolved through the router.
This all concerns dest_addr. Domain names in src_addr are not handled by the resolver’s set support at all — they are resolved once when the service starts and become a fixed list, so a negated source domain excludes only the addresses the name had at that moment.
Getting Help
General discussion of this package is happening at the OpenWrt forum thread.
If things are not working as intended, with pbr versions 1.2.1 and higher, please run this command:
service pbr support
This will print all the diagnostic information you need to include with your post while masking sensitive information. You can also use -p to automatically upload the output to paste.ee:
service pbr support -p
First Troubleshooting Step
If your router is set to use default routing via VPN tunnel and the WAN-targeting policies do not work, you need to stop your VPN tunnel first and ensure that you still have an Internet connection. If your router is set up to use default routing via a VPN tunnel and when you stop the VPN tunnel you have no Internet connection, this package can’t help you. You first need to make sure that you do have an Internet connection when the VPN tunnel is stopped.
Donate
If you find pbr useful, know that your help is needed. Please consider donating to support development of this project. I’ve been developing it in my spare time without any external funding, outside of my GitHub sponsors. You can donate by:
- Sponsoring me on GitHub with monthly donation.
- Sponsoring me on GitHub with one-time donation.
- Sending a donation thru PayPal.
Error Messages Details
If no details are available above for a specific error message you have received, please make sure to add information requested in Getting Help section to your forum post/GitHub issue. If you have discovered an issue with the pbr package, the information from Getting Help is crucial for fixing it.
Warning Messages Details
Warning: Please set ‘dhcp.lan.force=1’
If the dhcp.lan.force is set to 1, this speeds up the dnsmasq start/restart times and in turn speeds up the pbr service start/reload/restart times. To make things faster, run:
uci set dhcp.lan.force='1'
uci commit dhcp
If your LAN interface name(s) are different from lan, adjust the command above.
Warning: Internal Version Mismatch
When you visit the WebUI page of luci-app-pbr, it checks the internal versions of 3 components:
- pbr: internal version stamp of principal package
- luci-app-pbr:
- internal version stamp of the Javascript code you’re seeing in the browser
- internal version stamp of the RPCD script which pulls information from your device and supplies it to the Javascript code
Because of the way the principal app integrates with the WebUI, it is important that all three internal versions are in sync or at least the luci-app-pbr internal versions are not lower than the pbr internal version.
If you’re seeing this message, make sure that the versions of the pbr and luci-app-pbr reported by opkg or apk on your device are the same by running:
command -v opkg > /dev/null 2>&1 && opkg list-installed | grep pbr
command -v apk > /dev/null 2>&1 && apk list --installed | grep pbr
If you have the matching versions of the pbr and luci-app-pbr installed you may still be seeing the Version Mismatch message.
- If the
luciCompatis lower thanpackageCompat, it means that your browser has cached the Javascript code for WebUI, it may be outdated until you refresh/delete the browser cache (or open your device WebUI in Incognito mode or a different browser). - If the
rpcdCompatis lower than thepackageCompat, it means that theRPCDservice needs to be restarted (runservice rpcd restartand re-login to WebUI or just reboot your device).
Warning: Incompatible DHCP Option 6
The pbr package now checks for incompatible DHCP Option 6 on start if resolver_set is used.
Warning: Unknown IPvX Gateway for device ‘XX’
This warning indicates that an interface is enabled but is not yet operational. This often is a transient condition and may occur, for example, when the WAN/uplink interface is still down during startup (WARNING: Uplink/WAN interface is still down, going back to boot mode) or when an interface takes longer than usual to become available, such as an OpenVPN connection. When an interface is not yet up, no gateway is available. In most cases, PBR will automatically restart once the interface becomes available, and the warning will disappear. You can safely ignore this warning if PBR restarts successfully afterward and the warning no longer appears.
If, however, the warning persists and no device is shown (Unknown Gateway for device: ‘), it indicates that an interface (device) is missing or not functioning correctly.
You can verify this by running ifconfig from the command line to check whether the interface (device) is present.
If you intentionally enabled an interface but did not configure it to start at boot, you can safely ignore the warning. This is also the expected warning for a deliberately device-less interface used as a sink, see Blackhole Interface.
Alternatively, if the interface is not needed, it is recommended to disable it.
Thanks
I’d like to thank everyone who helped by providing testing and feedback on this service. Without contributions from @hnyman, @dibdot, @danrl, @tohojo, @cybrnook, @nidstigator, @AndreBL, @dz0ny, @tew42, bogorad, rigorous testing/bugreporting by @dziny, @bluenote73, @buckaroo, @Alexander-r, @n8v8R, psherman, @Vale-max, @aliicex, dscpl, pesa1234 and multiple contributions from @egc112, @bigsmile74, @dl12345 and trendy and feedback from other OpenWrt users it wouldn’t have been possible. WireGuard/IPv6 support is courtesy of IVPN.